 Persona Help Center
Overview
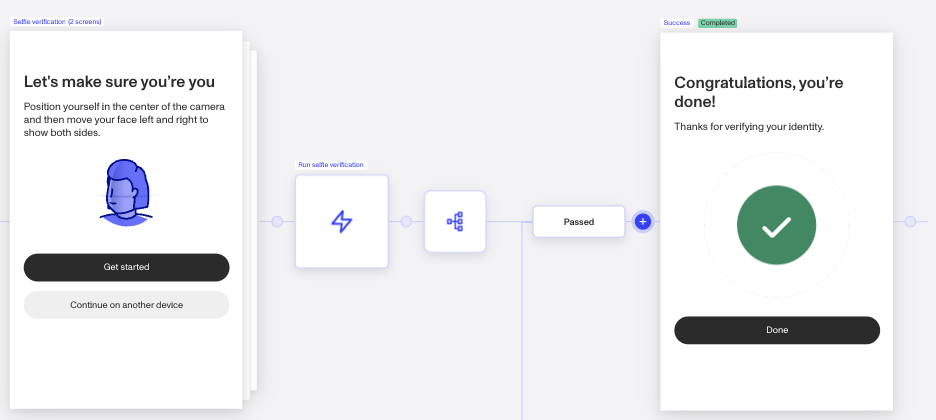
Our standard Government ID and Selfie inquiry template will fail the user if they fail all Government ID attempts.
The most common variation on this template is to collect the selfie even if the Government ID verification fails. This allows you to collect all of the user’s information upfront.
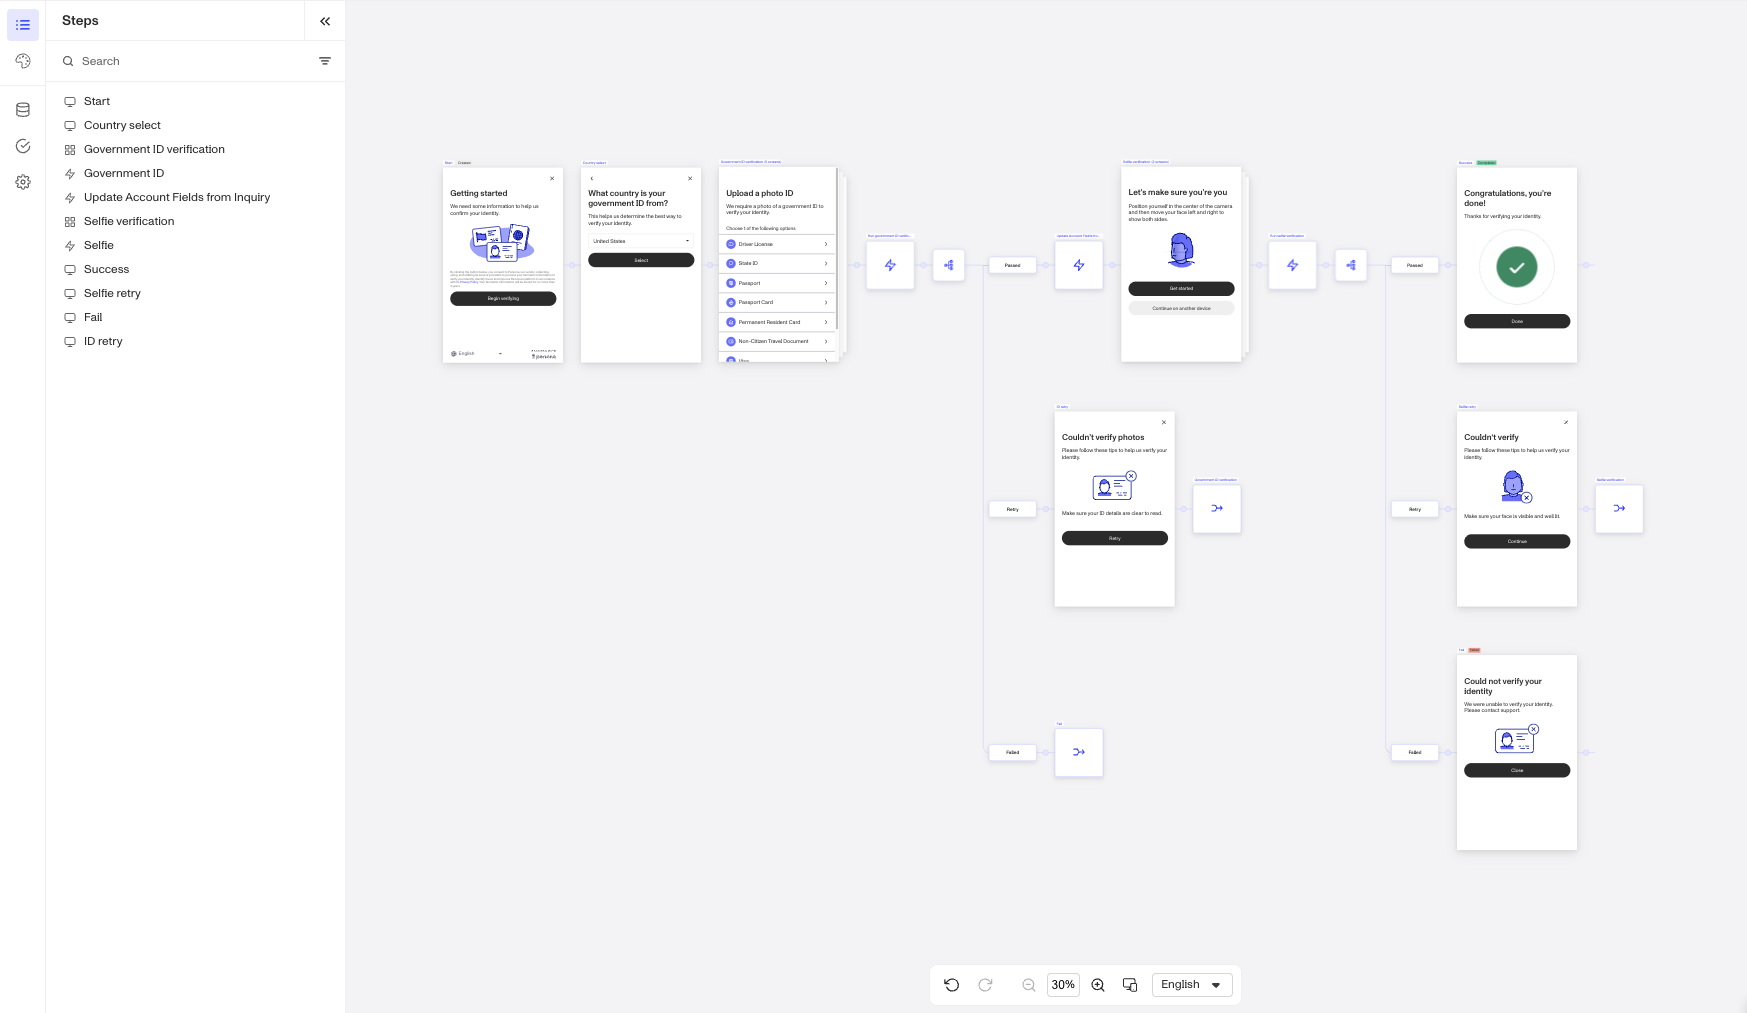
Updating your inquiry template to always collect the selfie requires modifications in just two areas of your inquiry template.
- Routing a failed Government ID to the Selfie Verification step instead of the Fail step
- If the Selfie has passed, check the Government ID verification status and use it to decide if the inquiry should be
CompletedorFailed
Tutorial
Let’s walk through how to configure this on your inquiry template step by step. Throughout this tutorial, you’ll also learn about:
- Tagging inquiries
- Connector steps
- Branching steps
Step by step
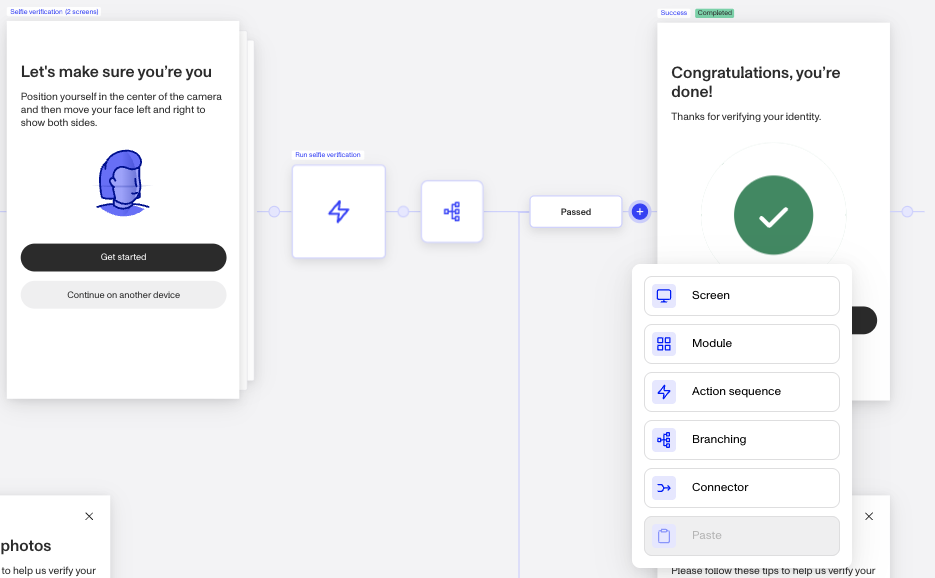
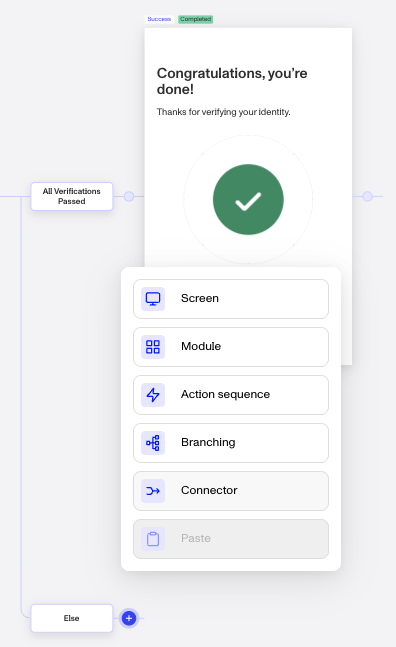
- Go to the “Failed” route of the Branching Step after your Government ID verification. Click the + icon to add an Action Sequence.
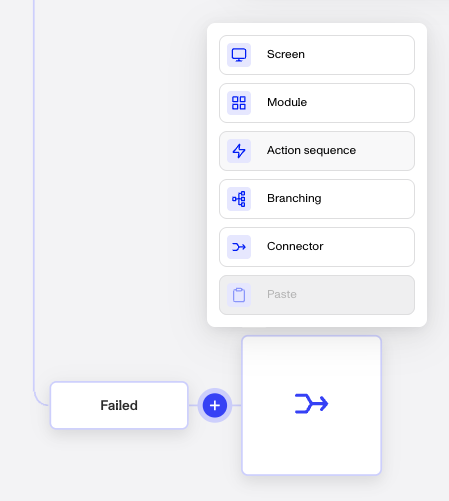
- A Placeholder Action will appear. Double-click on the tile or or click the Pencil icon to edit it.

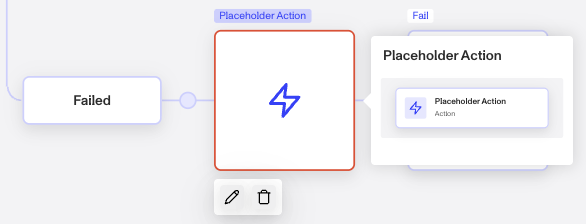 3. Click on the Placeholder Action tile. This will open up the configuration panel on the right side. Click on the Action dropdown and change it to Tag Object. In the Tag section, you’ll want to create a new tag FAILED GOVID.
  You can use tags to signify anything “of interest” on that inquiry— usually verification failures or report hits, that can be used when filtering inquiries in the dashboard or as “hint” to your manual reviewers on what they should be looking at. Above, we’re tagging that the inquiry failed its Government ID verification so that we can make sure to route the user appropriately after they’ve passed the Selfie verification— if the Inquiry has a
 FAILED GOVID tag, we’ll know that the user should actually be routed to the Fail screen.
- For readability, change the step’s name to match the tag:
FAILED GOVID.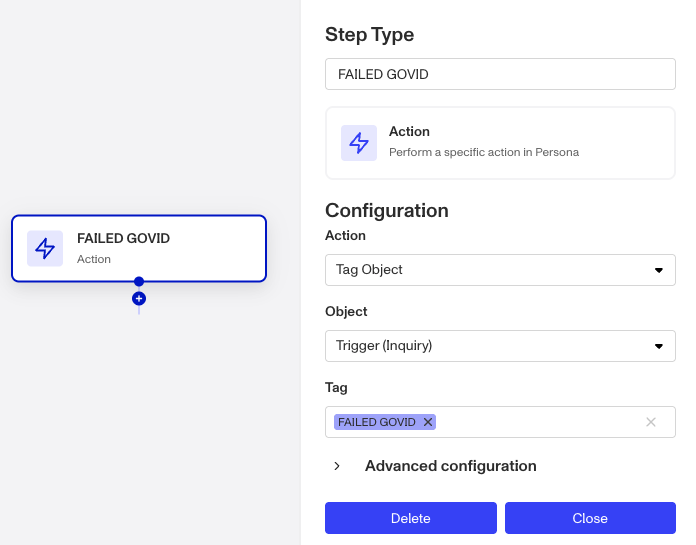
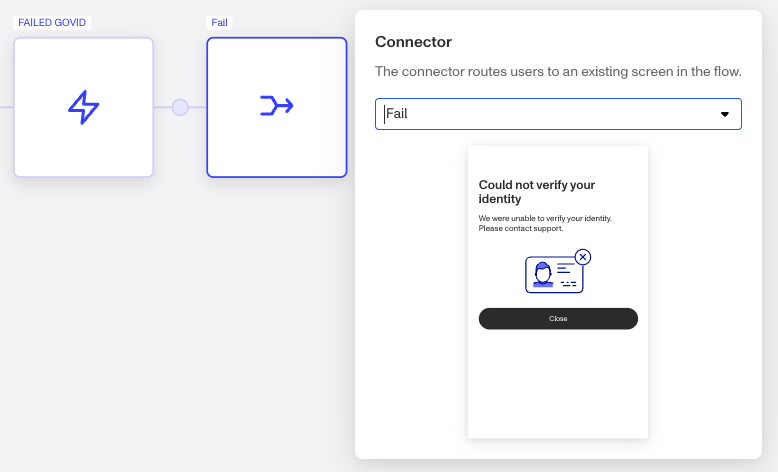
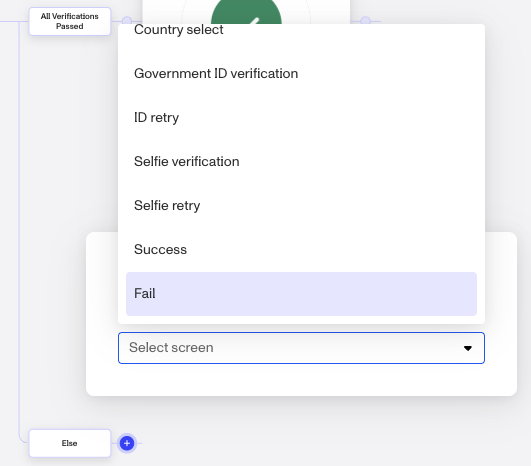
- Click the Flow link at the top of the screen to get back to the main flow. You’ll see that your action step name now shows up. Currently, if the user fails all attempts at Government ID verification, they will be connected to the Fail screen. Hover over the Fail connector step and the Connector window will pop up. Here you are able to select with other step in the flow you want this connector to route to.
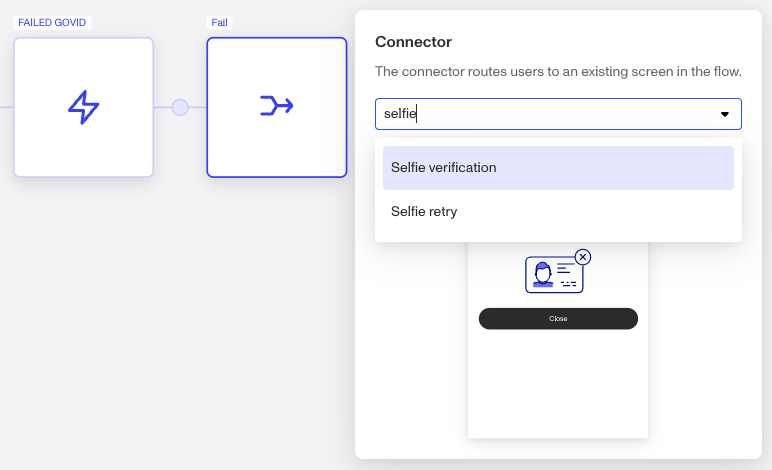
- Search for the Selfie verification step and select it. Now, the user will be routed to collect their Selfie even after GovID failure!
- It’s always a good idea to save your work as you go! Make sure to leave a description so your teammates will know what you changed. You’ll want to refresh the page after saving as well— to get the
FAILED GOVIDtag you just created to be available for use in the next step.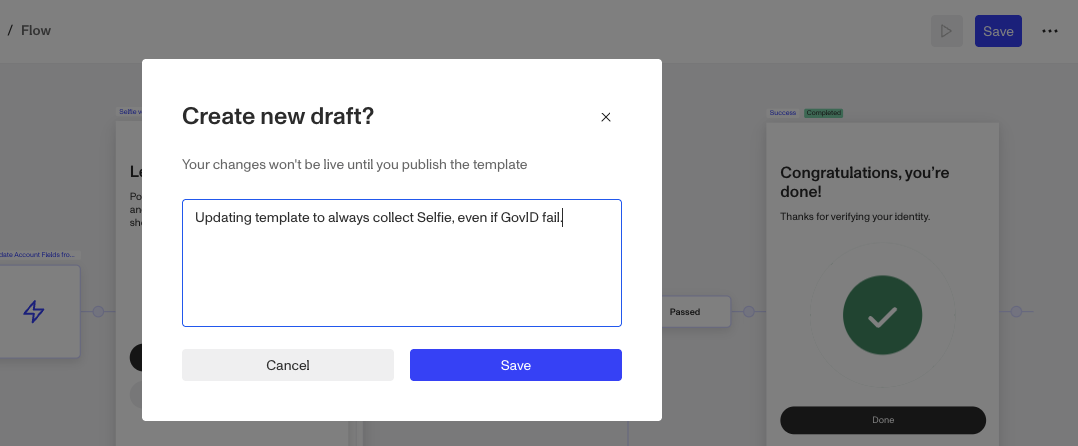
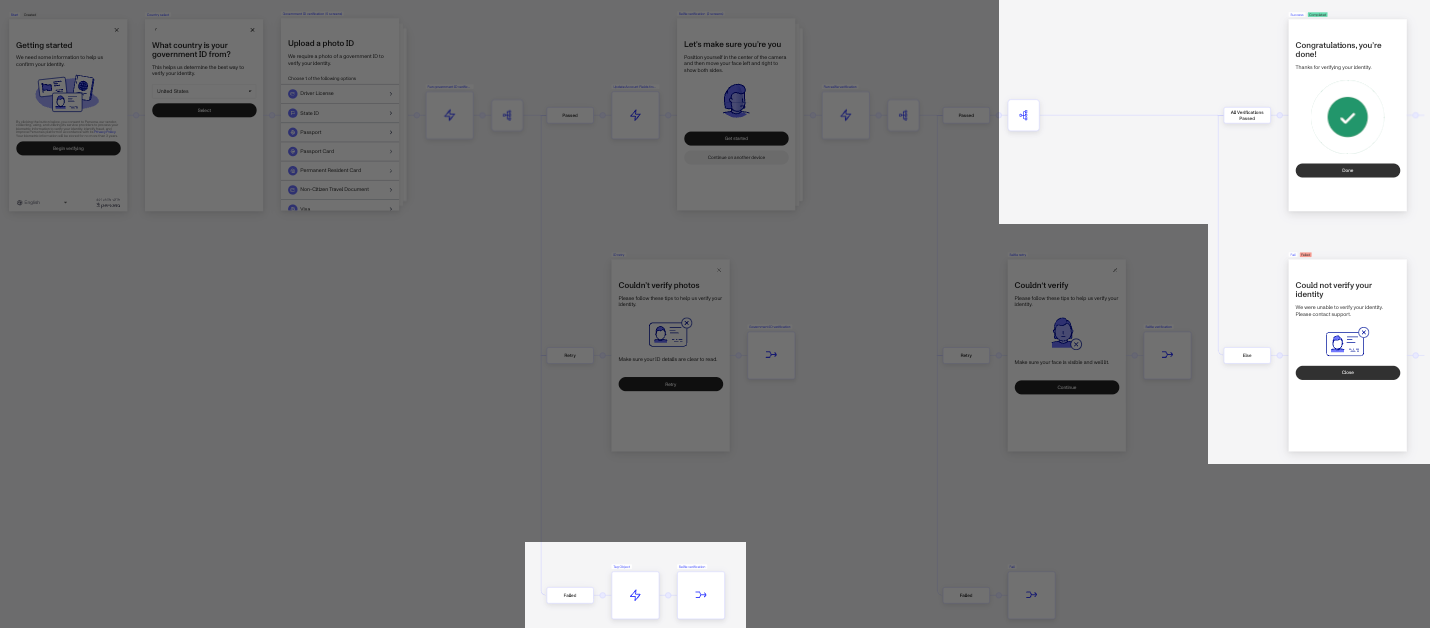
- Now head over to the Selfie Verification section in your template. We’ll be focusing only on the Passed branch — since if the user fails their Selfie verification, they’ll already be routed to the Fail screen.
- Click on the circle in between the Passed branch and the Success screen to add in a Branching step.
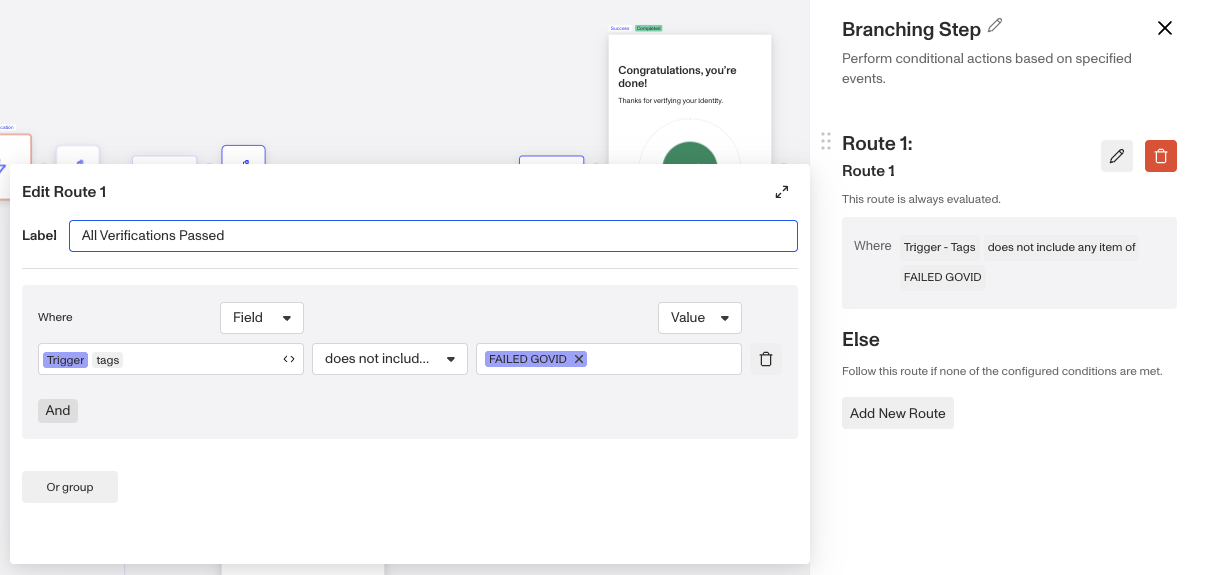
- We’re going to specify the condition that would lead the user to the Success screen. Click on the Pencil icon in the right panel to do this. When the Branching Step opens, it defaults to an empty rules which you’ll fill build in a moment.


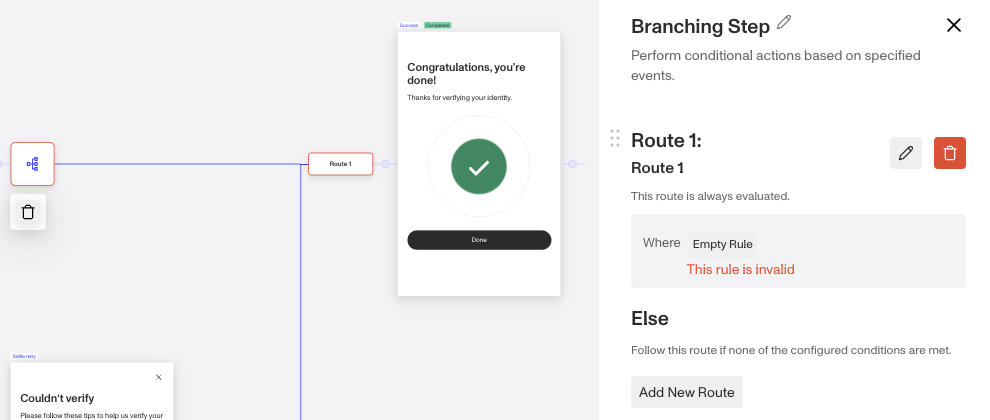
The user should be be shown the Success screen if all verifications passed. That means we’re going to make sure the inquiry is missing the FAILED GOVID tag. Configure the condition to reflect this.
- Now you’ll need to specify what happens if the condition does not hold true. Head over to the Else branch and click to add a Connector step.
- In the Else case, where the user did not pass all verifications, you’ll want to Fail the inquiry. Connect the step to the Fail screen to do this.

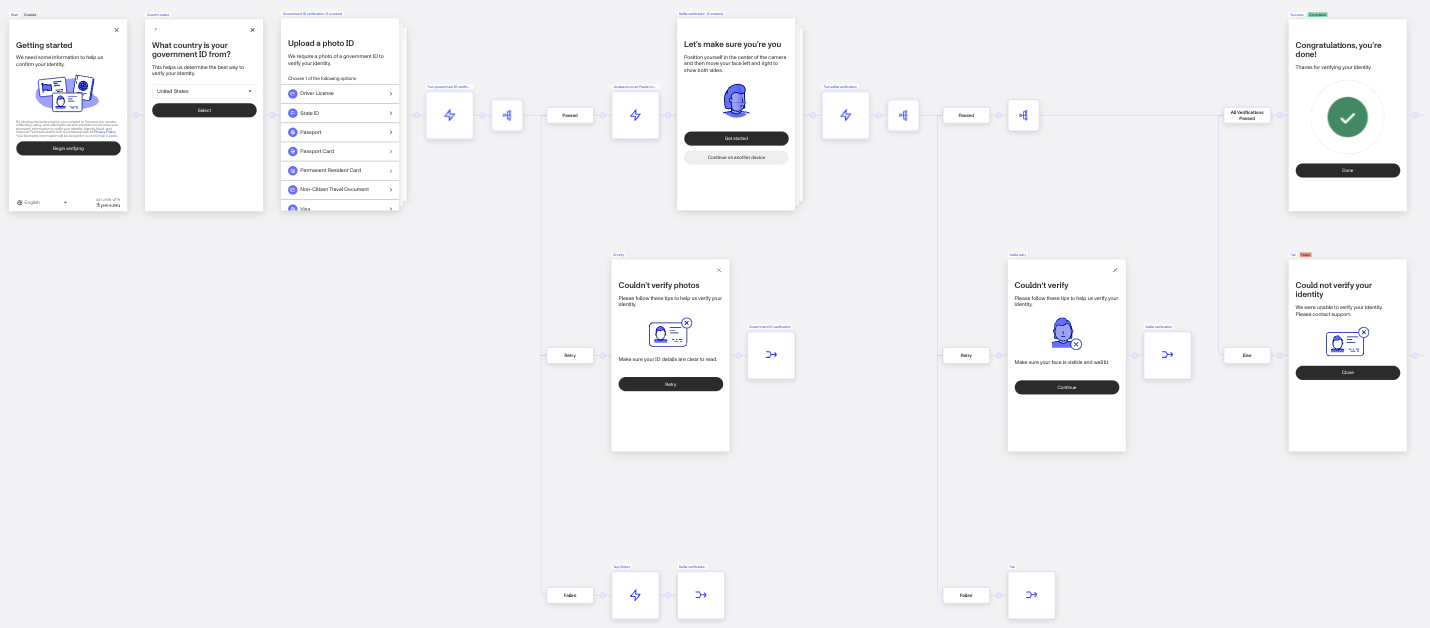
You’re done configuring! Your inquiry template should now look like this.
The next step would be for you to test your changes. See more on why and how to do that here.
And don’t forget to save and publish your changes.
Updating the Account with GovID?
 As called out earlier, these changes from the standard template can lead to a situation where on a run with a failed GovID verification, the information from the inquiry is never updated on the account. You have three options for handling this scenario:
- Make no further changes and manually update the account with the information from the submitted ID after a review process.
- Include an Update Account step along the GovID’s failed route to update the account every time.
- Create or use an existing post-inquiry workflow to review the Failed inquiries and then depending on the inquiry’s approval, auto-updating the account with the info from the GovID.
Of the three options we recommend 3, then 2, and lastly option 1. The post-inquiry option has all the benefits of automation with a review process first, giving you the most clean data on your accounts. Option 2 is quicker to implement, but you’ll end up with data that didn’t pass verifications on some of your Accounts. And with option 1 you just lose the data from the failed GovIDs without manual data entry.
Post-Inquiry Workflow option
If you have not yet built a post-inquiry workflow, then you should review our article on Building your first workflow which walks through how to create a workflow that triggers off an inquiry’s Completed event. Below is the basic workflow that either updates the inquiry status to Declined, Marked for Review, or Approved.
 But we need to build a workflow configured for a different use case that includes:
- Triggering off of Failed inquiry instead of Completed, because we expect the failed Gov ID to fail the inquiry.
- A Conditional Branch checking if Gov ID failed while Selfie passed.
- Marking the Inquiry for Review and then waiting for the review to be completed.
- A Step to Update the Account Object with fields from the Gov ID.
- Steps to approve, decline, or mark for review.

Steps
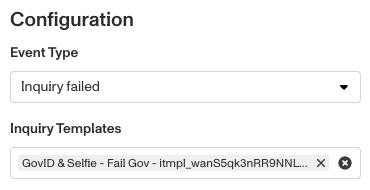
- Create the new workflow and set the event trigger to ‘On Inquiry failed’. We also recommend to select which inquiry templates you want the workflow to trigger off of, else it will trigger off of every failed inquiry.
- Add a Conditional Branch step. Set the name to “Failed Gov Passed Selfie”.
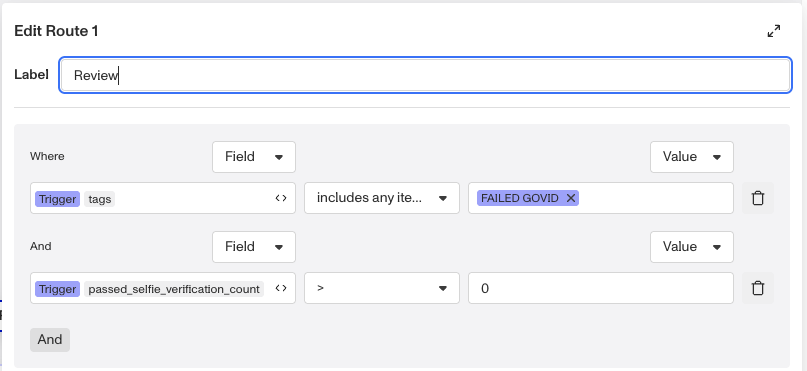
- In route 1 of the conditional, set the Label to ‘Review’. For the statements, set the first to Trigger.tags “includes any item of” “Failed GovID” tag. You may need to create a new tag for this purpose. For the second statement, click the “And” button. Set the field to “Trigger.passed_selfie_verification_count”, the operator to “>”, and the value to “0”.
- On the “Else” route, add an Action Step, and set it to “Decline Inquiry”.
- On the “Review” route, add an Action Step, and set it to “Mark Inquiry for Review”.
- On the “Review” route, add a Wait Step, set to to wait for “Object”, set the target object to “Workflow Trigger”, and the events should only be “Inquiry approved”. Finally, the default resolution time (seconds) can be any amount that provide enough time for your review team to evaluate the inquiry (the default is “2592000” seconds, or 30 days).
- On the “Review” route, add a Conditional Branch, and set its name to “Approved?”
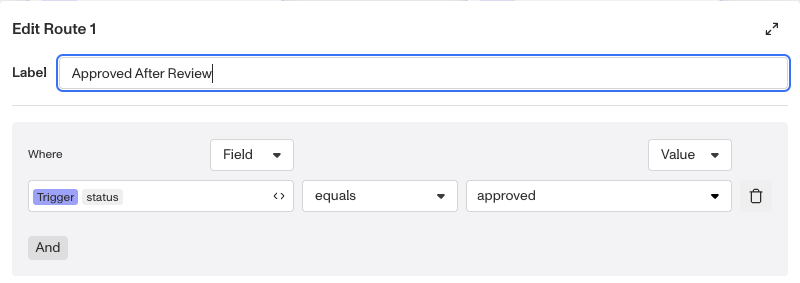
- In the “Approved?” conditional branch, edit route 1. Set its label to “Approved After Review” and its condition to “Trigger.status” equals “Approved”.
- In the “Approved After Review” route, add an action step and select Update Object. Set the Object to “Trigger (Account)”.
- In the Update Object step, click the “Fields” button.


Mapping Fields in the Update Object step
 Which Field does the Update Account Fields from Inquiry step normally update? Quite a few as you can see in the screenshot below:
 You can configure each of these fields to be updated on the account to ensure parity between your normal inquiries that passed both verifications, or you can opt to update only the fields you deem essential. It will take a handful of clicks to set each field.
 Once you’ve configured all your desired fields in the “Update Object” step, Save the changes to the workflow. And then publish.
The last step would be for you to test your changes. See more on why and how to do that here.
And don’t forget to save and publish your changes.