Overview
Businesses need identity data infrastructure that reflects the multiple entities that they support and their respected information. Examples include drivers and their drivers licenses, shoppers and their phone numbers, and stores and their street addresses.
An organization can create custom Account Types in Persona and equip them with custom fields to craft a source of truth for every entity type, reflecting the complexity of their business.
Default Account Types vs. Custom Account Types
An Account Type is a template for an Account whose fields store data and whose statuses reflect the behavior of the specific entity it represents. By default, all organizations have a User Account type in their Dashboards.
Custom Account Types are Account Types whose fields and configurations are defined by the customer and are unique to the dashboard they were created in.
What can organizations do with Custom Account Types?
- Store custom fields and information that are specific to each account type
- Represent businesses or groups, in addition to individuals
- Store KYB data more effectively and enable easier business account lookups
Create a Custom Account Type
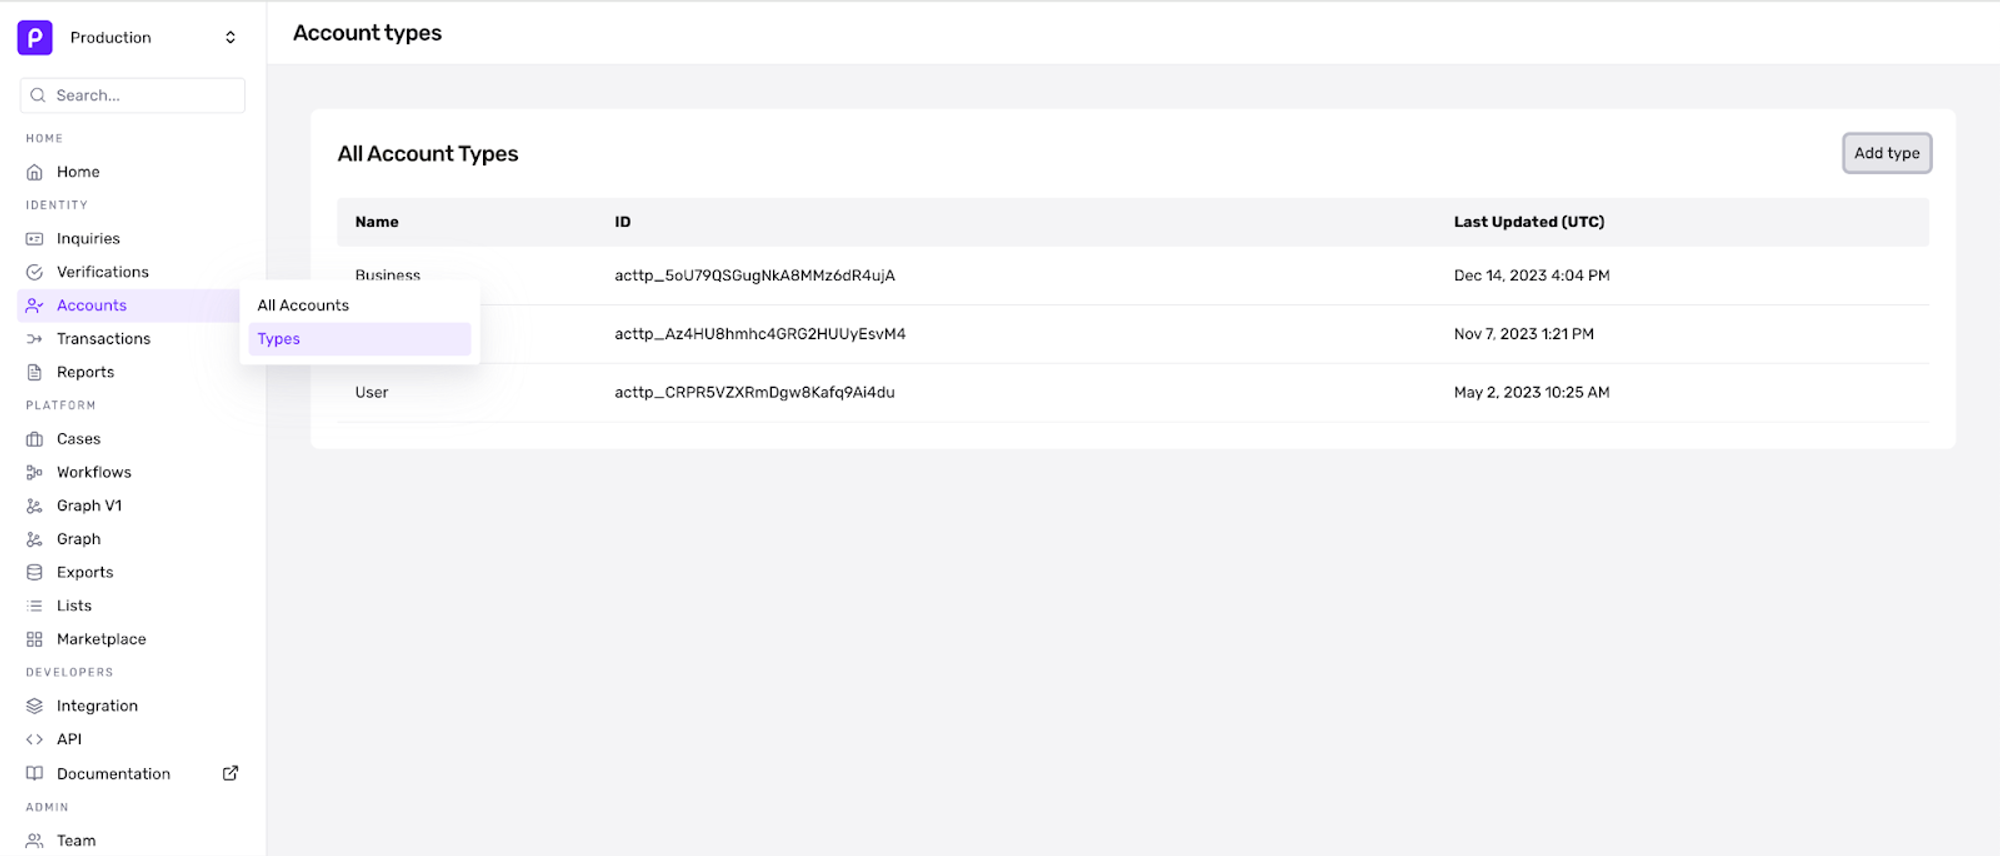
- In the Dashboard, click Accounts > Types in the navigation bar.

- In the upper right corner, click Add type to create a new Custom Account Type.
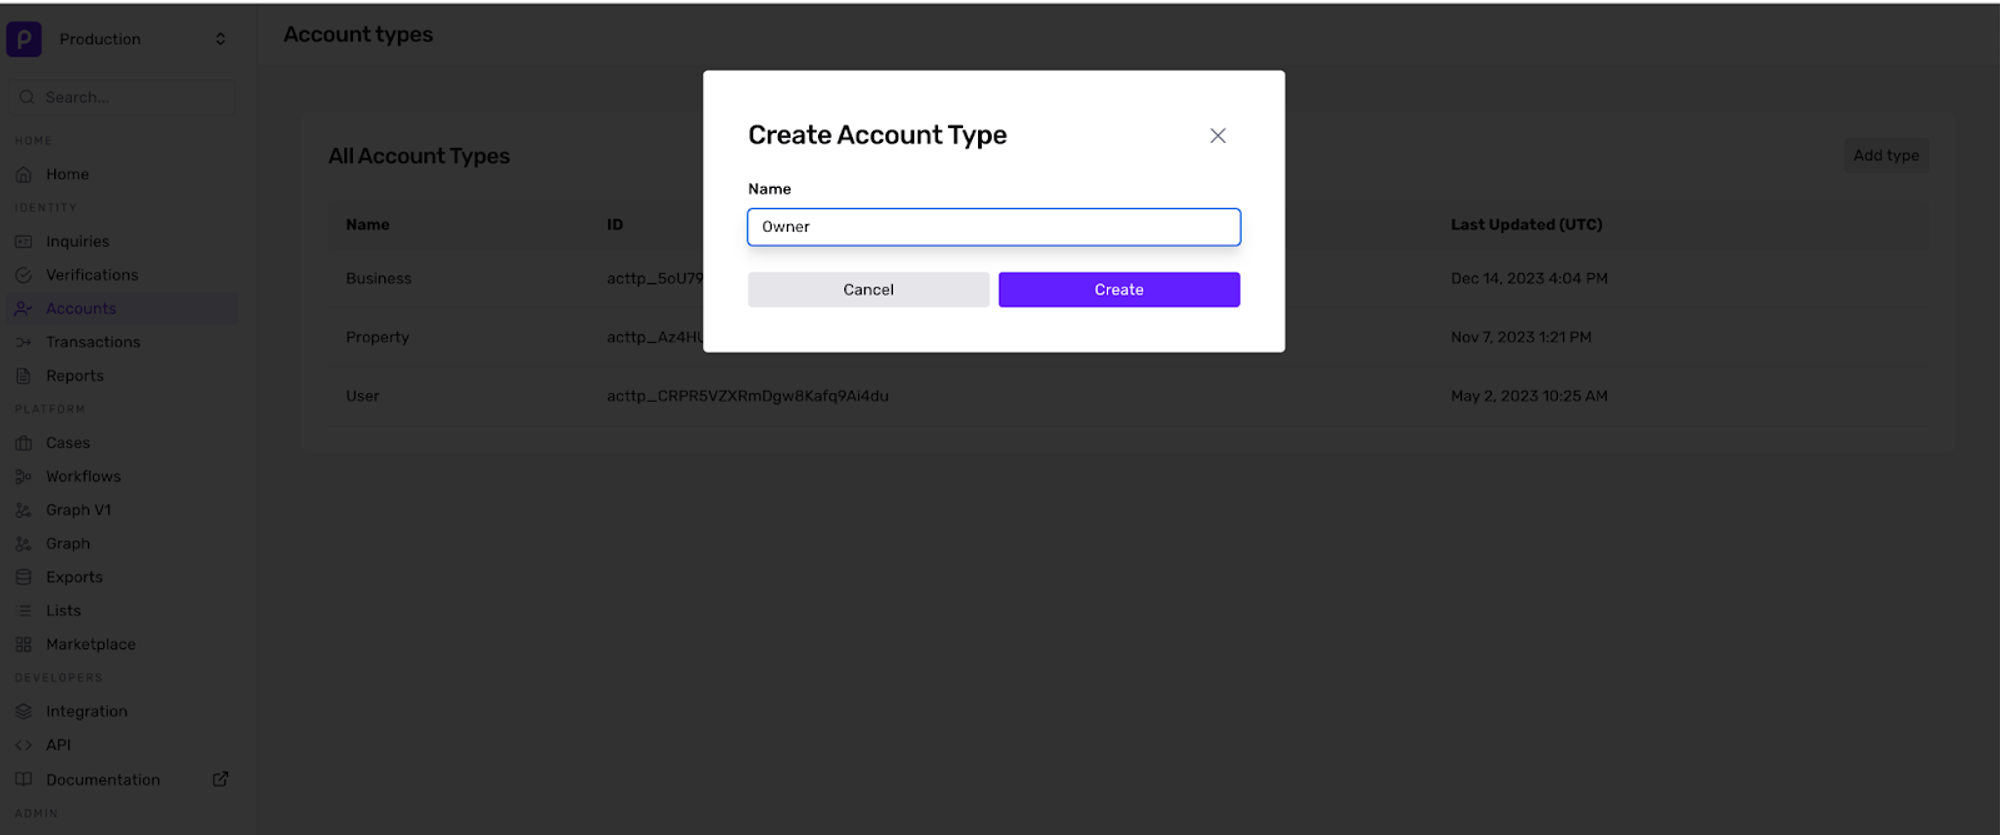
- Enter a name for the Account Type that you’re creating and click Create to open the New Account Type configuration panel.

Add custom fields to the Custom Account Type
To customize the kind of info your organization can collect and store for this entity, add custom fields to the Custom Account Type within our Field Editor.
- From within the New Account Type configuration panel (see above), click Settings, which will bring you to the Fields tab
- In the upper right corner of the Field Editor, click the + Add Field button. This will open a configuration panel on the right side of the screen.
- Fill out the details for each custom field. Then set the necessary configurations:
- Details: Field name: the name of the custom field
- Details: Field key: a unique identifier for the field (only used to update the field via API)
- Details: Field type: describes the type of field value allowed, such as an array, date, integer, string, etc.
- Configurations: Identifier: unique identifiers defined by a customer organization that are used to look up an exact match quickly (email address, phone number, etc.). Identifiers can only be set on fields where the field type is string. Identifiers are not supported in nested string fields like hashes.
- Configurations: Case Sensitive: field setting that treats “ABC” and “abc” as the same value.
- Configurations: Unique: field setting that prevents the same value from being used in multiple records for this field within the same account type. We do not recommend storing account identifiers as NOT unique if you want to use them to sync data across systems. Account identifiers would represent 1:1 mappings between an account within Persona and an account within the customer’s system.

- Click Add field in the bottom left corner of the Add Field panel to save it. Once the field is added, you will no longer be able to edit or delete the field
Note: To delete the field while drafting it, click Cancel or click the ••• button on the field labeled “Unnamed field” in the fields list, then click Delete.
More ways to use Custom Accounts
Once your Custom Account Type and Custom Fields are created, the next step is to choose how Accounts organize and display information in the Dashboard using the Accounts Layout Editor.
Then, decide how to act on each Account Type with Custom Actions and Custom Statuses.

