
Relay does not create records in your Dashboard
Most Persona products leave a trail you can browse. An Inquiry has a page, a Verification has a page, and you can filter, export, and review them in the Dashboard.
Relay works differently, and it is worth understanding why before you integrate.
Relay is designed so that Persona does not receive your application context, and your systems do not receive the identity data collected during verification. Keeping those two sides apart is the whole point of the product. A browsable record in your Dashboard, tying a verification to a user in your system, would reconnect exactly what the architecture separates.
So Relay gives you one thing: the claim result, returned to your server when you redeem it.
Your integration is your audit trail. When you redeem a claim result, store it against whatever identifier your product uses, along with the claim type and the time. That record is what you will rely on later to show why a user was allowed through.
Most teams store the claim type, the result, the timestamp, and the method that produced it where the claim type discloses one. See Claim types for which claim types include the method.
Why this design is worth explaining to your users
The separation is not just a compliance posture, and it is something you can tell your users plainly.
Your platform never holds their name, birthdate, or documents, so there is nothing sensitive of theirs in your systems to leak or subpoena. Persona evaluates the claim but does not learn which platform asked or what the user was doing there. Once the result is produced, Persona deletes the verification data behind it.
For a user, that means they can prove one specific thing about themselves without linking that proof to what they are doing on your site, and without handing over more than the question requires. That is a materially different offer from a standard age gate, and it is usually the reason drop-off improves.
The two halves of an integration
A Relay integration has two components:
- A client-side integration that runs the user-facing verification.
- A server-side integration that creates the Relay session and retrieves the claim result.
Both are required. Together they support the Privacy Pass flow that keeps verification and result retrieval cryptographically separate.
1. Create a Relay session
Your server creates a Relay session, stores the Relay token and Relay secret, and returns the Relay session access token to the client.
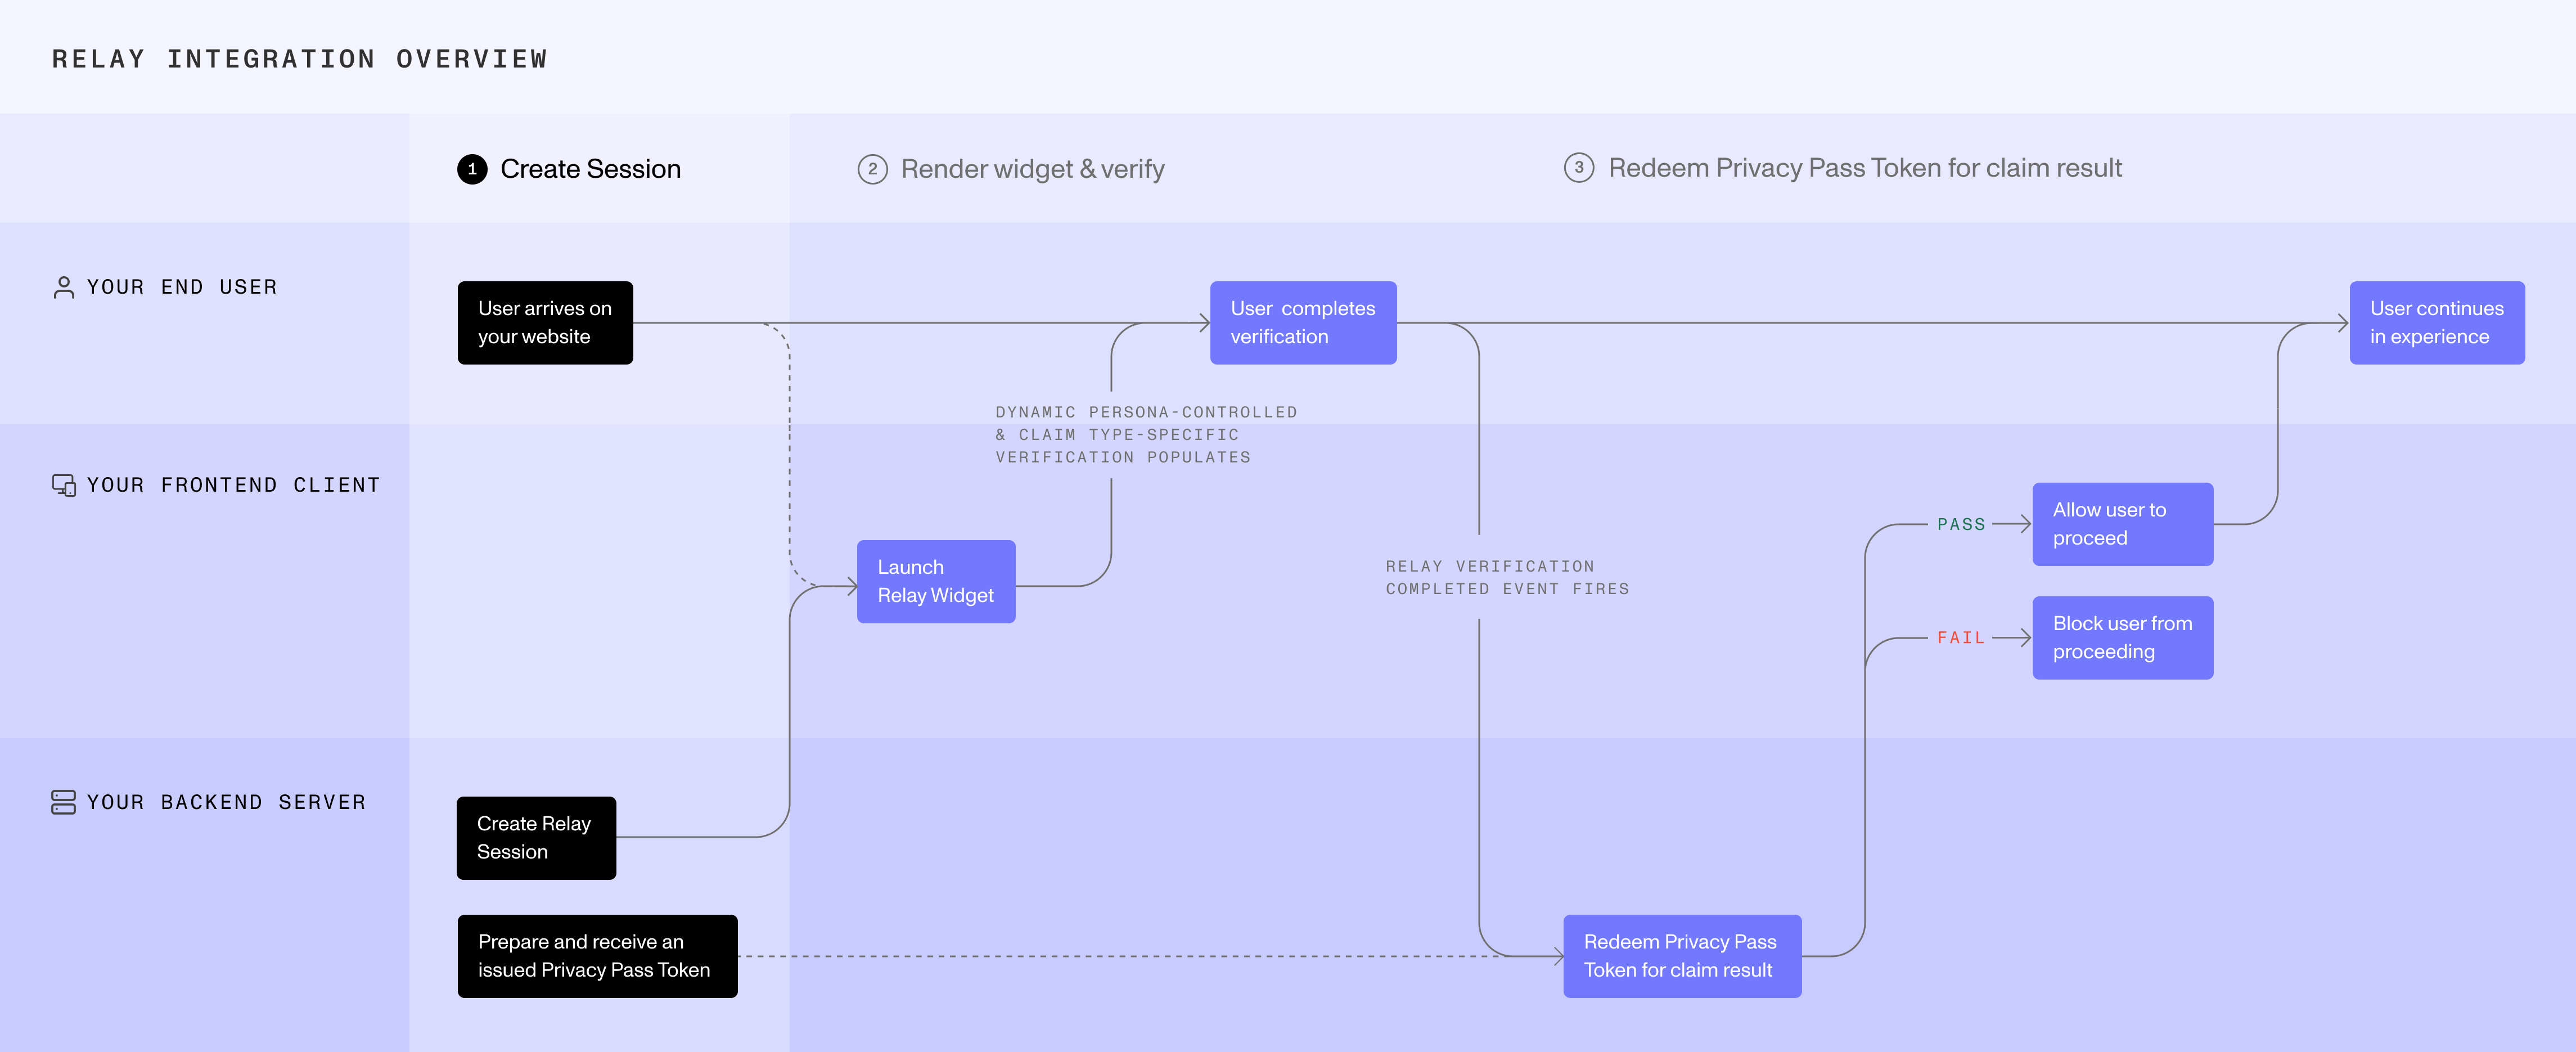
Three values come out of this step and it matters which is which:
| Value | Where it lives |
|---|---|
| Relay token | Your server. Identifies the session. |
| Relay secret | Your server only. Never send it to the client. |
| Relay session access token | The client. Short-lived, and the only one that goes there. |
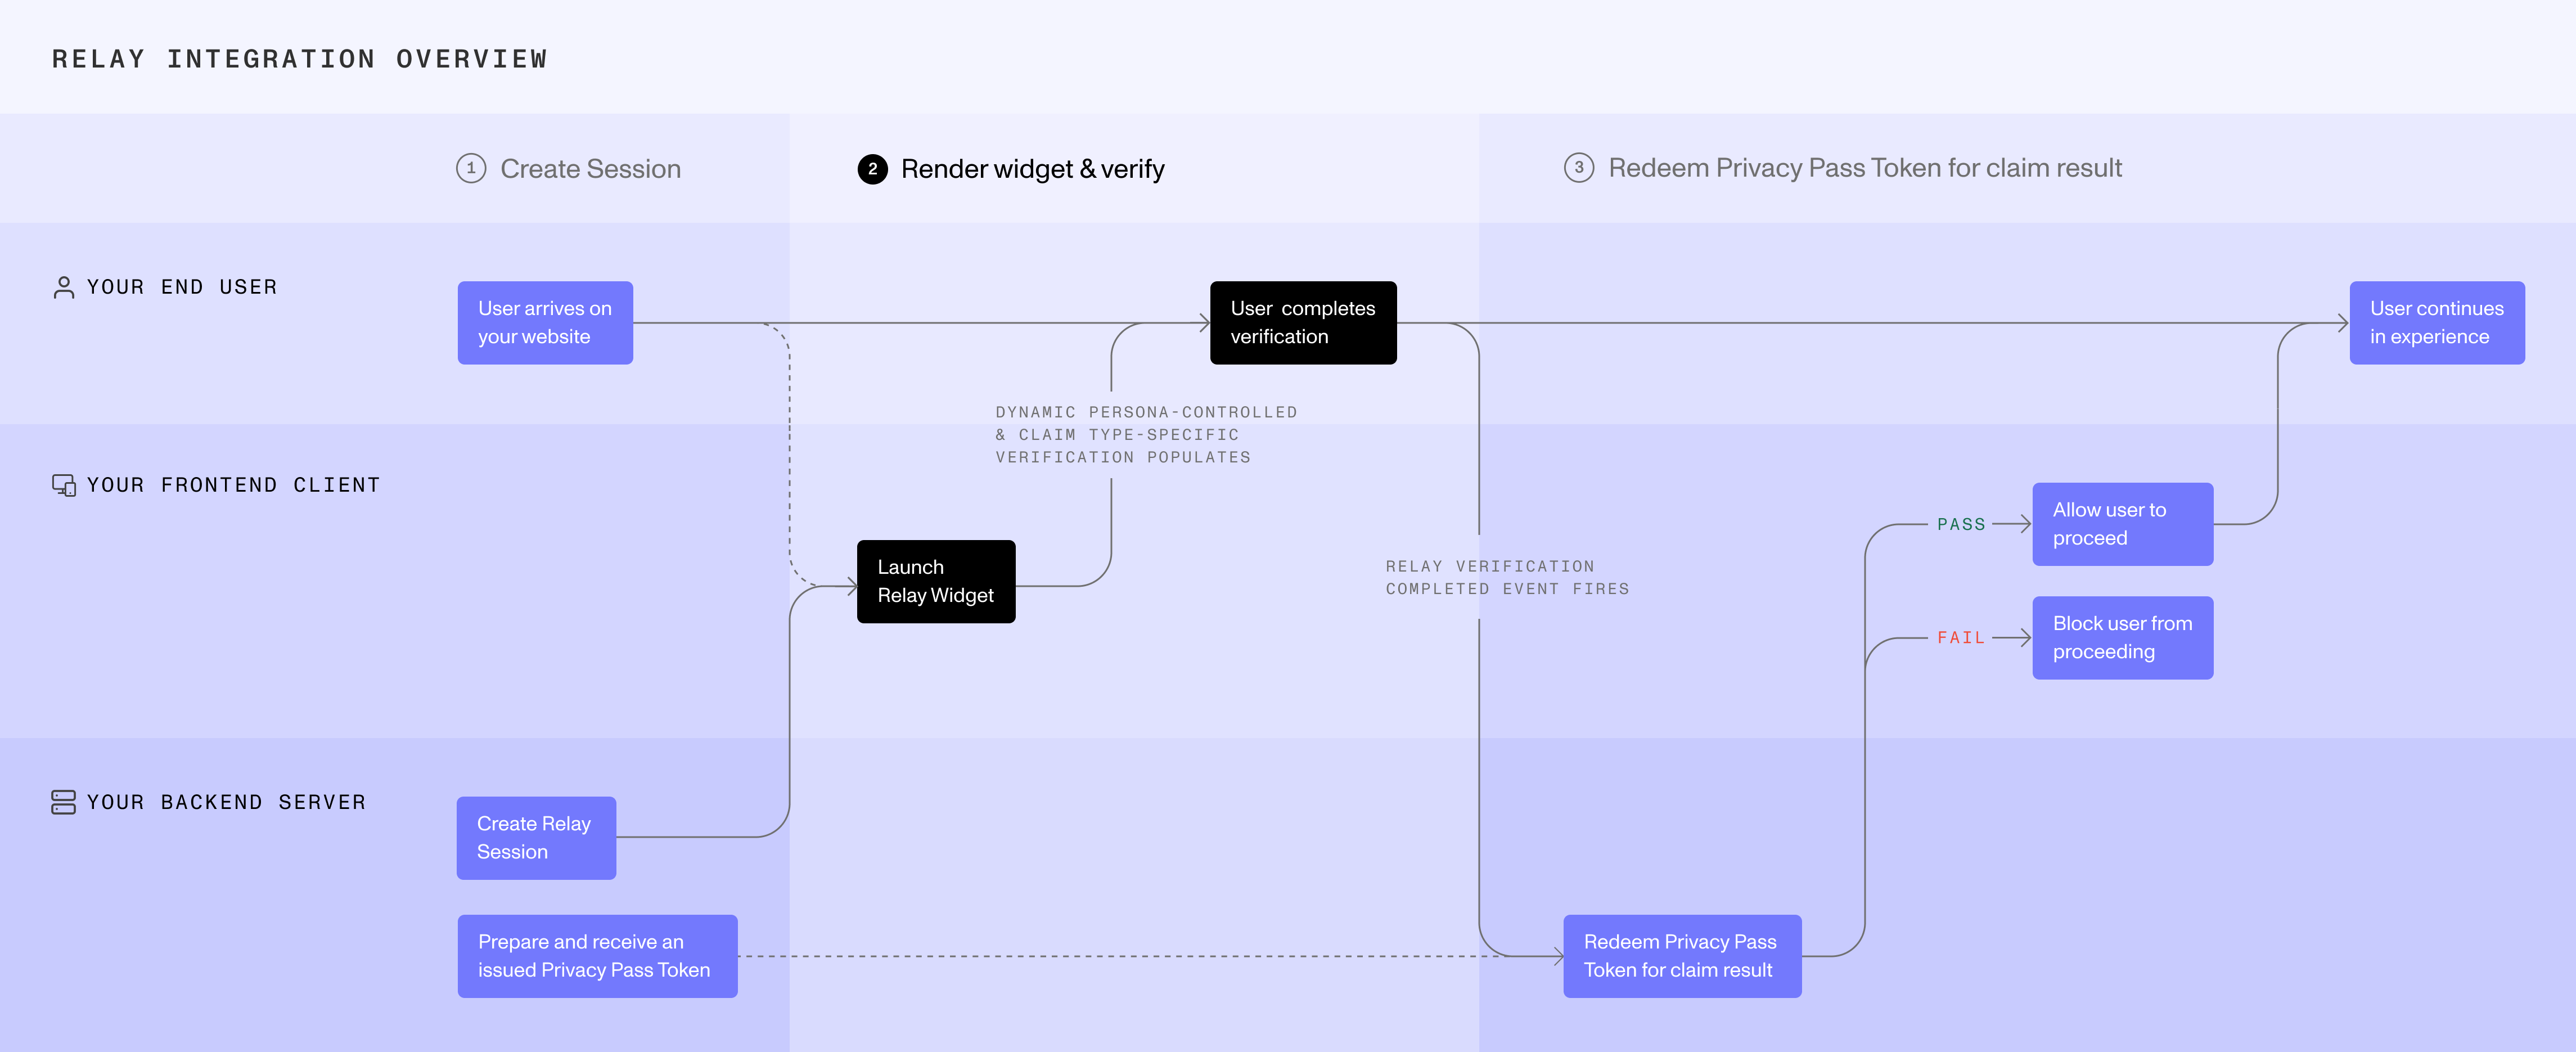
2. Run the user-facing verification
The client uses the Relay session access token to start the verification.
3. Retrieve the claim result
Your server redeems a Privacy Pass to retrieve the claim result.
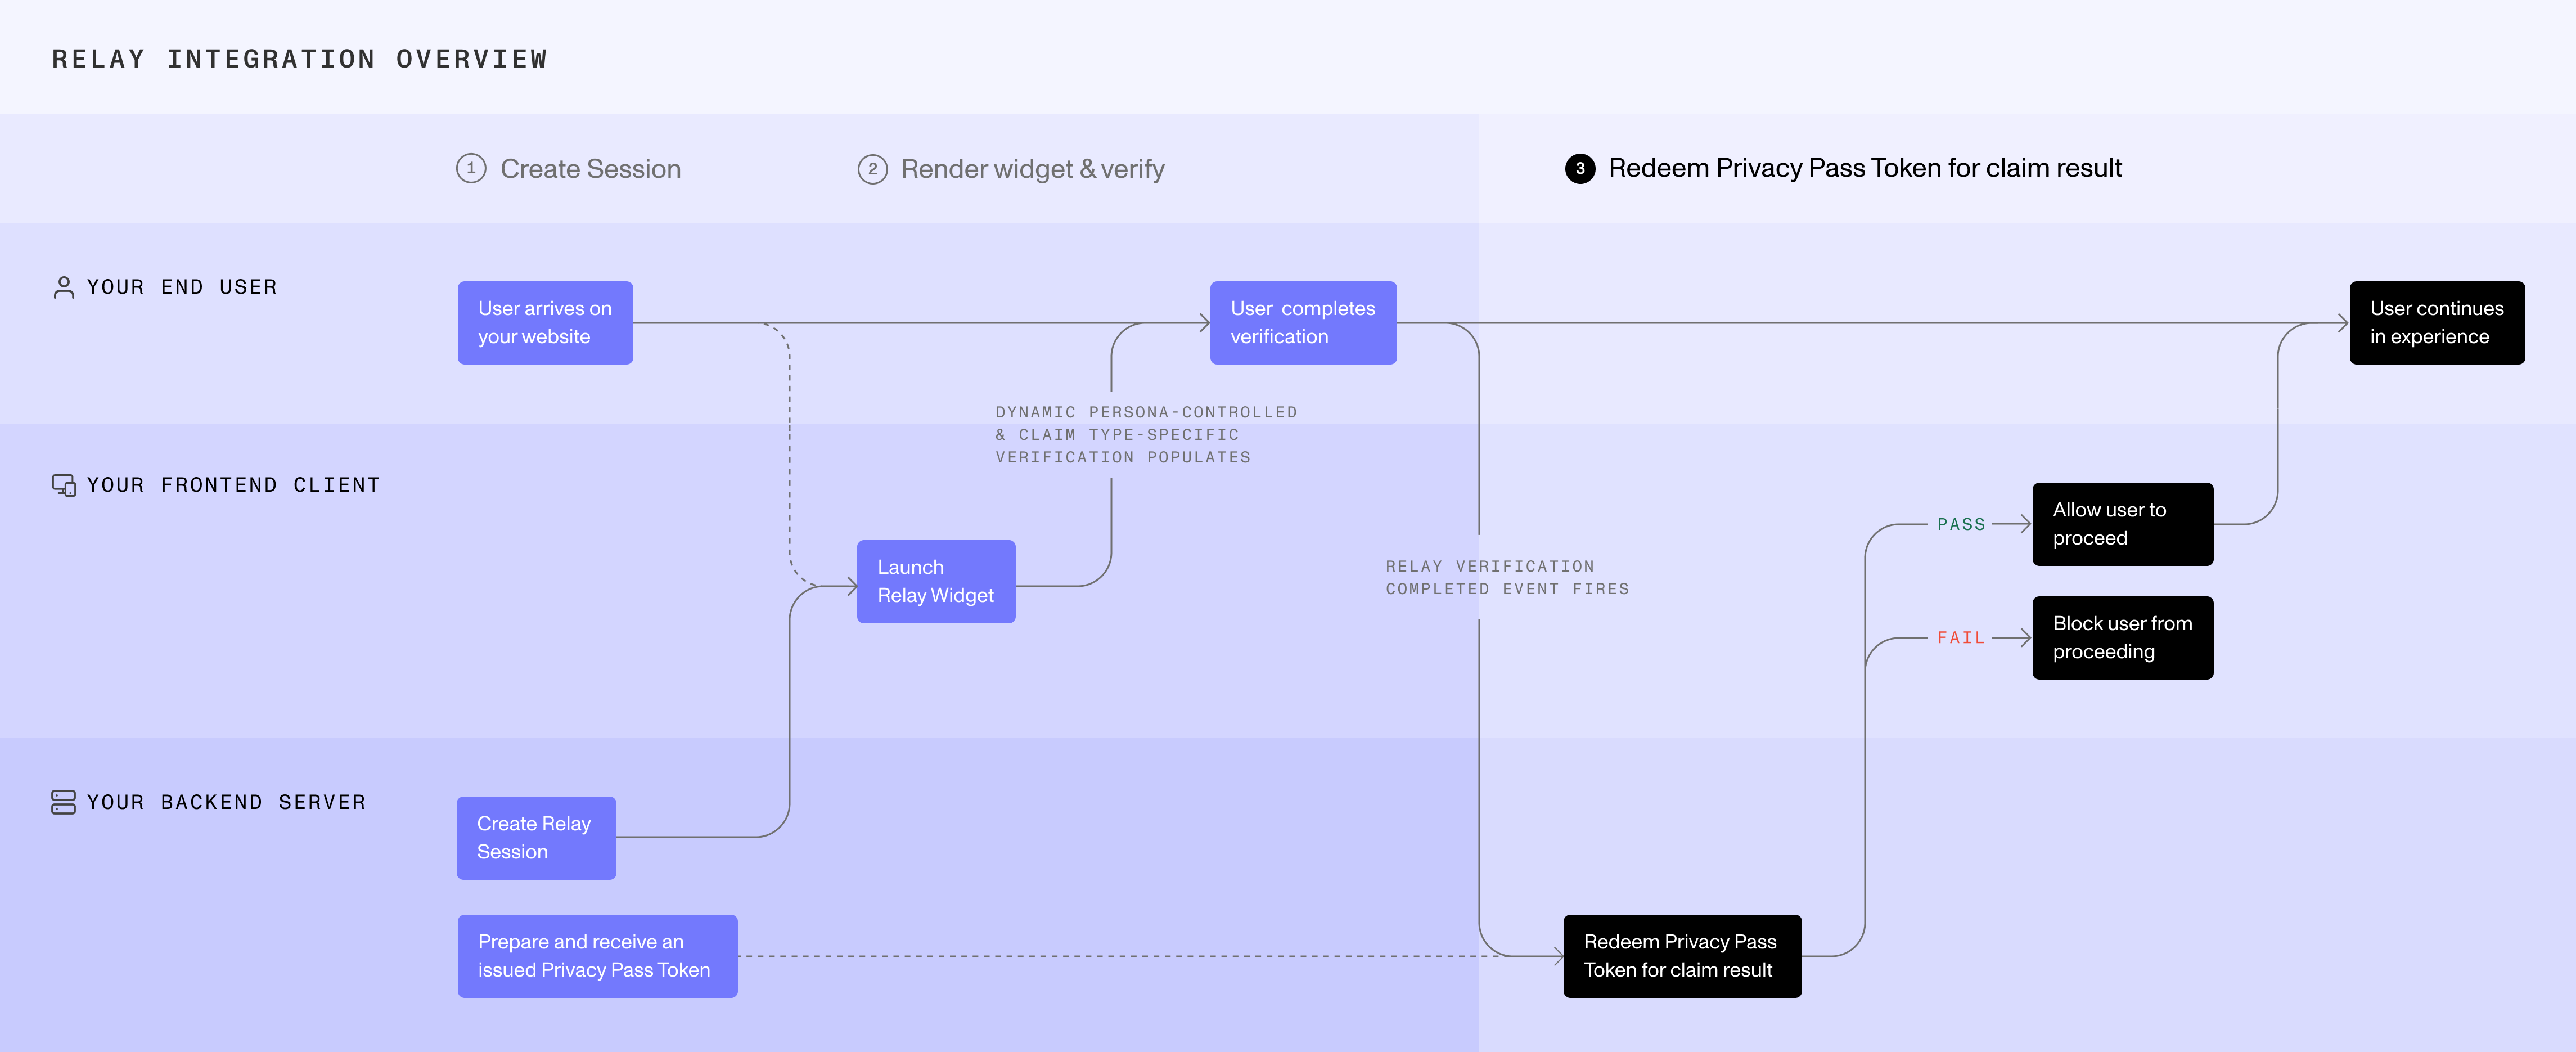
Start retrieval when the client tells you the user-facing flow has finished. How you learn that depends on which client-side experience you chose, and each of the articles below covers it.
Choose your client-side experience
Relay supports web, iOS, and Android. Pick the one that fits your product.
| Experience | Best for |
|---|---|
| Embedded Widget | Websites that want Relay rendered directly inside the page |
| Hosted Flow | Websites that want to send users to a Persona-hosted page |
| iOS and Android SDKs | Native mobile apps |
Choose your server-side integration
Use the same server-side method to create the session, manage the Privacy Pass, and retrieve the result.
| Method | Best for |
|---|---|
| Server SDK | Backends where you want the SDK to handle the Privacy Pass cryptography and retries. The documentation lists the languages available. |
| Relay Gateway Service | Any stack, through a small service you deploy that exposes the same operations over HTTP |
| API | Teams that want to implement the Privacy Pass protocol directly |
If you need a platform or integration method that is not listed, contact support or talk to your Persona team.
Set up your API key
Issuing a Privacy Pass uses your API key, so the key needs the right permission.
- Navigate to the Dashboard and open your API key.
- Find the Relay section in the permissions list.
- Enable Write Privacy Pass.
That permission is what lets your server issue the Privacy Passes it later redeems for claim results. See the API keys documentation for how permissions work generally.
Before you build
A few decisions are easier made up front than retrofitted:
- Encrypt the claim payload. You can supply your own public key when you create the session so the payload comes back encrypted and only your server can read it. See Encrypting the claim payload.
- Pick your theme. Relay can follow the user’s device preference or lock to light or dark. See Light, dark, and auto theme.
- Decide what happens on a failed claim. Relay returns the result; your product decides whether to let the user through, offer another route, or block. Work that out before launch.
Try it before you build
Persona hosts a public demo at explore.withpersona.com/relay. It runs a complete integration on a sample site and shows each step as it happens, and you can switch the activity panel to a technical view to see the same steps as SDK calls, gateway requests, or raw API requests. It is the fastest way to see the whole flow before you write any code.
Full technical documentation
The developer documentation is the source of truth for the integration itself, including code samples, request and response shapes, and reference material: