
Overview
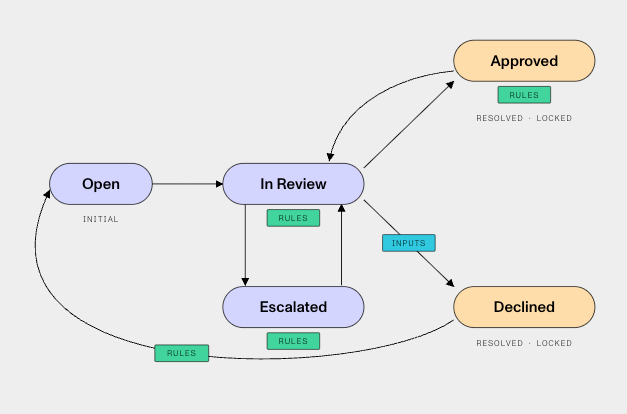
Case status rules let you define how a Case moves through your review process. In a Case template, you can configure which statuses are available on a Case. You can also define the requirements that must be met before a status transition and whether a Case becomes locked when it reaches a status.
For example, a fraud-review template could follow this path:
- Open → In Review → Approved
- Open → In Review → Escalated → In Review
You could require a reviewer to complete a checklist, add a resolution comment, and select a disposition tag before moving a Case to Approved. You could also enforce that reviewers cannot skip from Open to Approved unless that transition is configured.
Configure status transitions
In a Case template, configure the starting status, statuses, and the directed transitions that connect them. Transitions determine which statuses a reviewer can select next. To restrict a transition further, you can add rules to the transition or its destination status, require comments or tags on the destination status’s Inputs tab, or require checklist items to be completed first, as described in Add rules to a transition.
Set the starting status
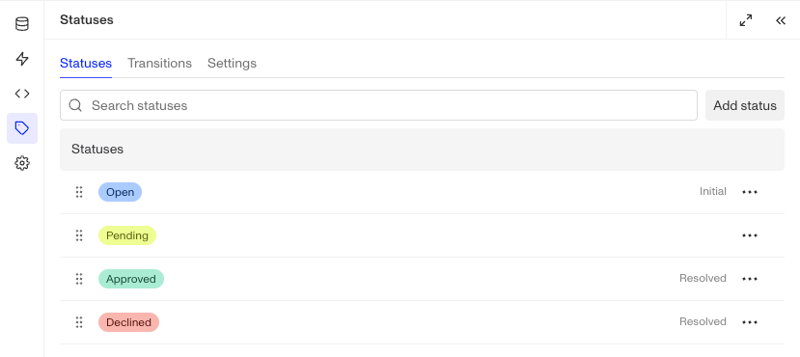
The starting status is the first active status in the Statuses list that is not a resolved status. There is no separate starting-status setting; you set it by ordering the list.
- In the Dashboard, open the Case template you want to configure. In the template editor’s left navigation, select Statuses.
- On the Statuses tab, drag the status you want new Cases to start in above the other active statuses. The status shows an Initial marker.
- Make sure Resolved status is not selected for that status. If it is, the next eligible status becomes the starting status.
- Save the Case template.
Add a custom status
To add a status, set its label and color, mark it as a resolved status, or collect tags when a Case moves to it, see Case Status. To lock Cases in a status, see Lock Cases in selected statuses. To require a comment, see Require a comment when a Case changes status.
Add a status transition
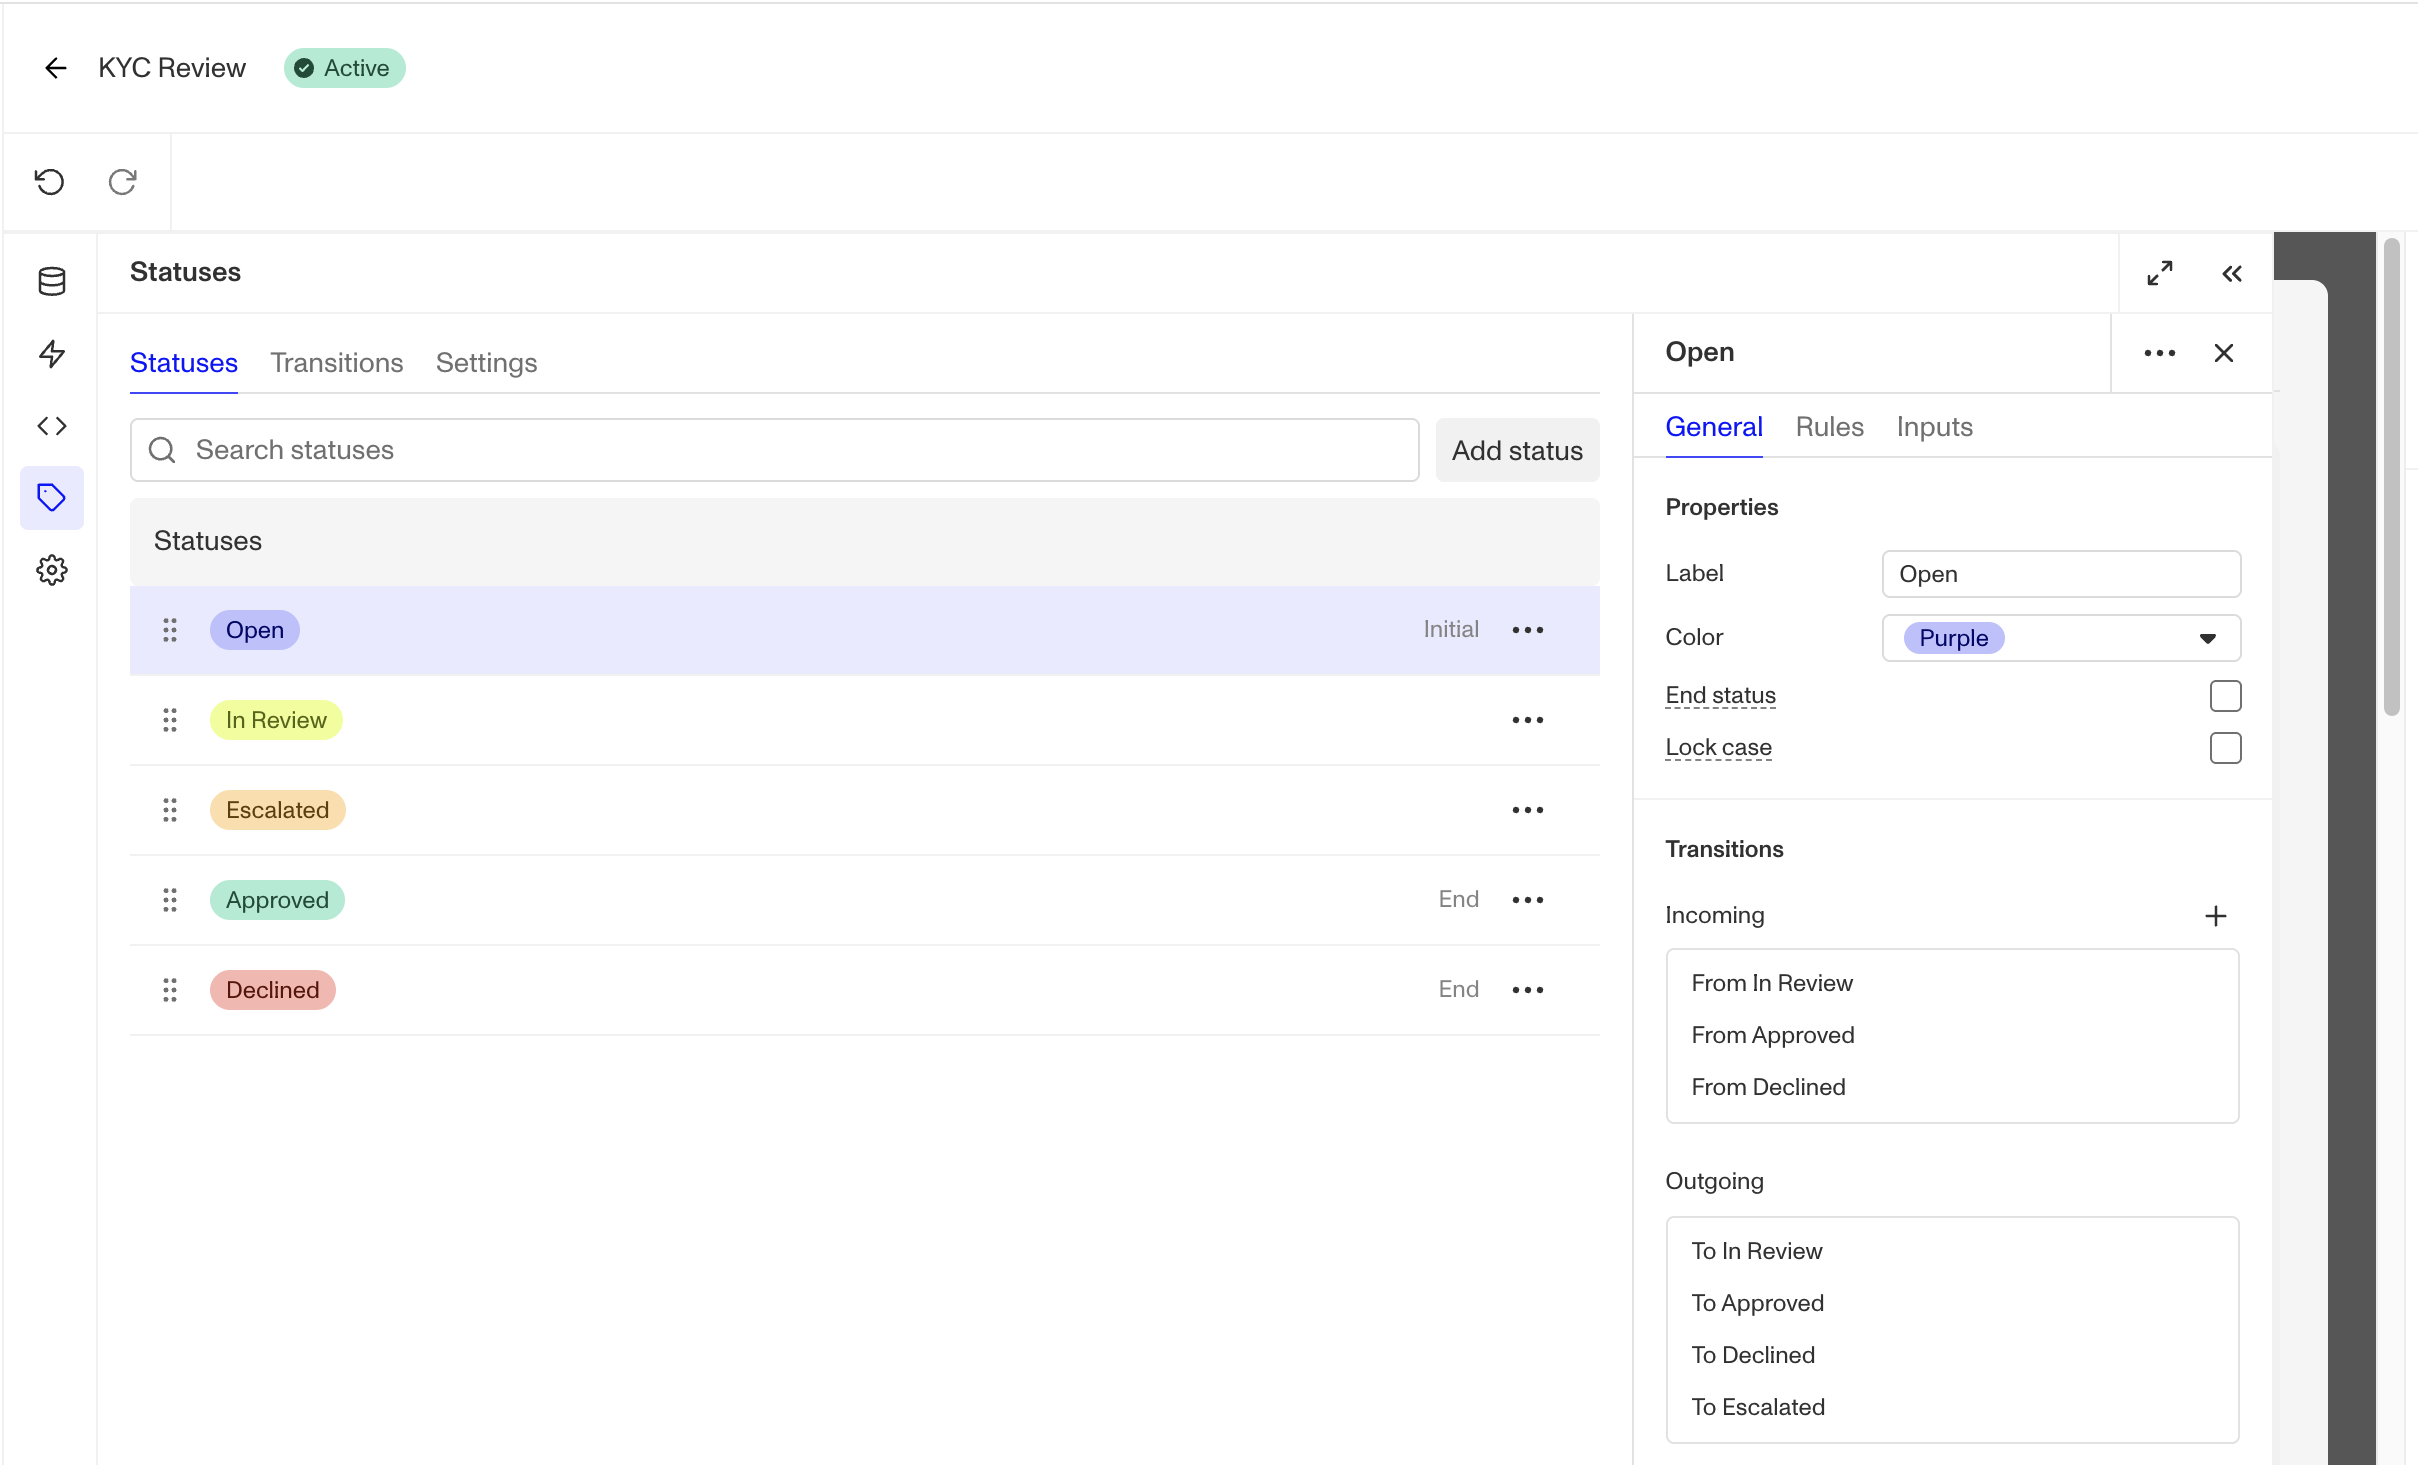
- In the Dashboard, open the Case template you want to configure. In the template editor’s left navigation, select Statuses.
- On the Statuses tab, select the status you want to configure. In its General section, find Transitions.
- To allow a Case to enter this status from another status, select + next to Incoming and choose the source status. To allow a Case to leave this status, select + next to Outgoing and choose the destination status.
- Save the Case template.
Each transition is directional. Adding an outgoing transition from Open to In Review, for example, also appears as an incoming transition on In Review.
Add rules to a transition
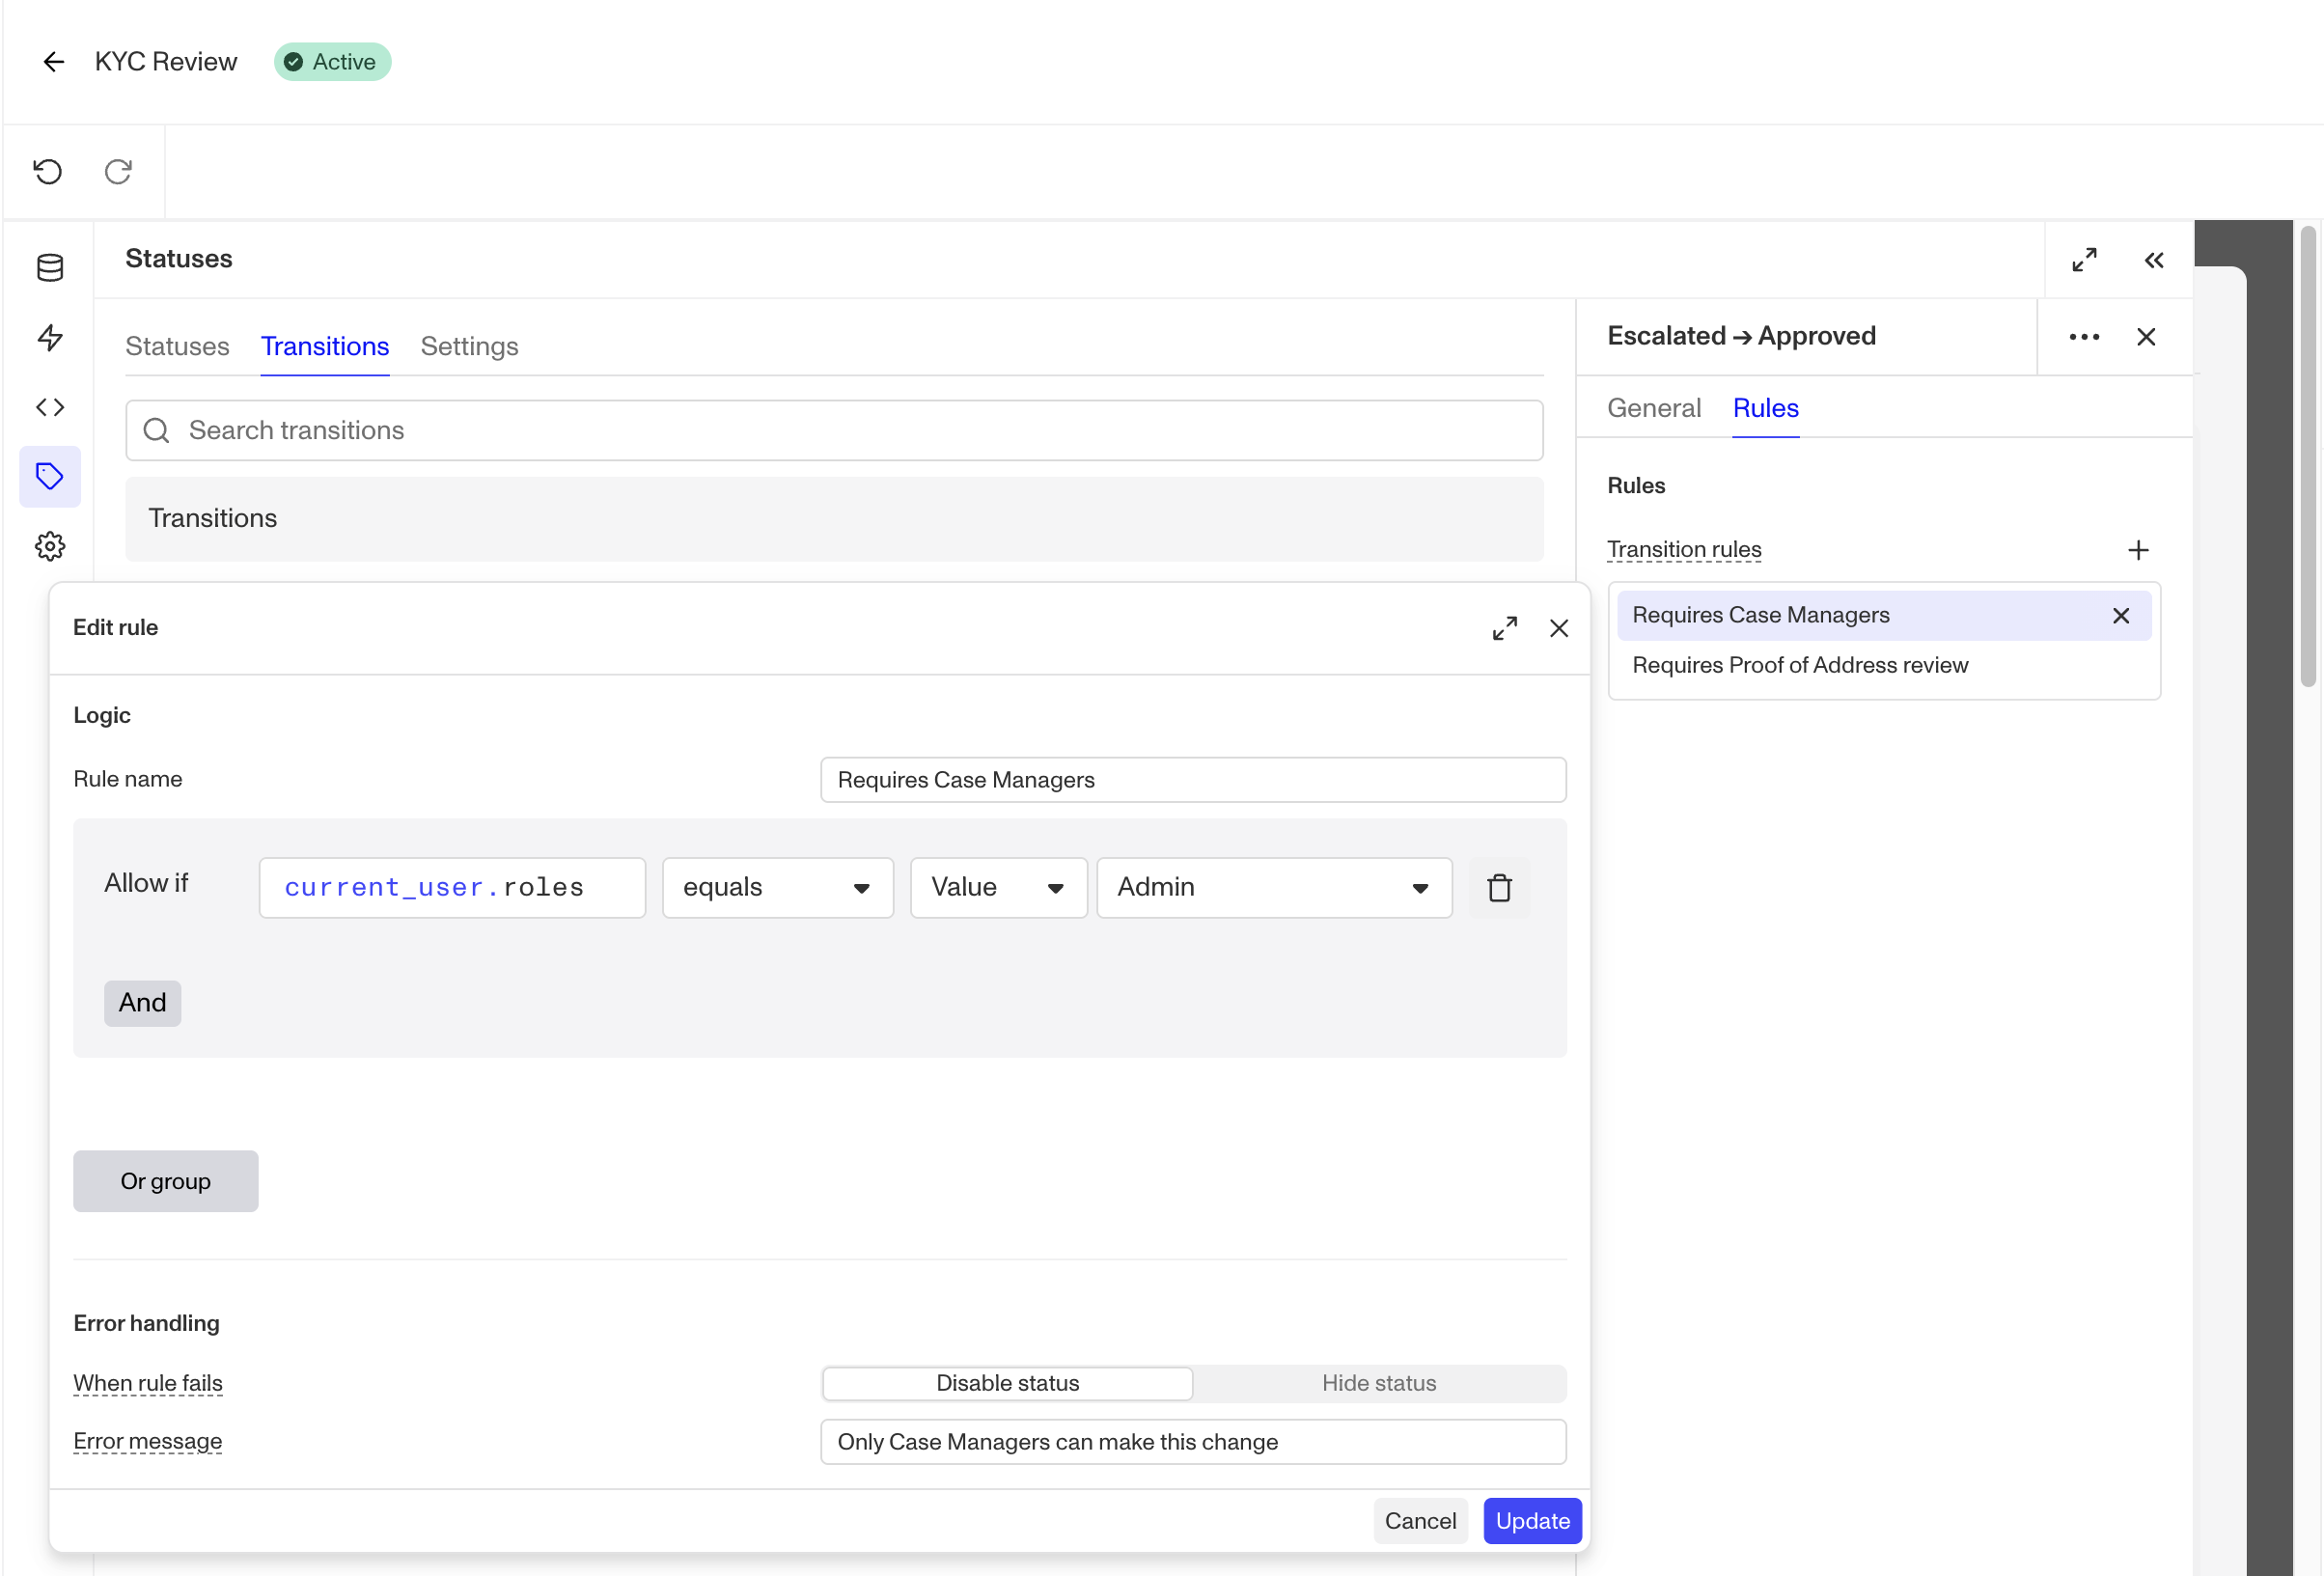
- In the selected status’s General section, under Transitions, select the transition you want to configure.
- Select the transition’s Rules tab, then select +.
- Enter a rule name and build the rule logic. Choose whether to disable or hide the destination status when the rule fails. If you choose to disable it, enter the message reviewers should see.
- Select Add rule, then save the Case template.
Requirements for a status change are configured in three places:
- Rules on a transition or on its destination status check conditions on the Case or on the user making the change.
- The destination status’s Inputs tab collects comments or tags when a Case moves to that status, including required comments, required tags, curated tag choices, and optional multi-select tags.
- The Checklist module defines checklist items that must be completed before a status change.
When a rule fails, you can choose whether to hide the status or show it as unavailable. For unavailable statuses, you can also provide a custom message explaining what the reviewer needs to do before they can continue.
The template must use unique status names and identifiers. It must have at least two active statuses, an active non-terminal starting status, valid transition endpoints, and no duplicate transition pairs.
For status basics, see Case Status. For the existing checklist requirements, see Using Checklists in Cases.
Require a comment when a Case changes status
Comments help explain why a decision was made and may be key for audit purposes. You can require reviewers to leave a comment whenever a Case moves to a specific status, such as Approved or Declined.
- In the Dashboard, go to Cases > Templates and open the Case template you want to edit.
- In the template editor’s left navigation, select Statuses.
- On the Statuses tab, select the status that should require a comment, then open its Inputs tab.
- Under Comments, turn on Enable comment, then select Required.
- Save the Case template.
The requirement applies when reviewers change a Case’s status in the Dashboard, including when they change the status of several Cases at once.
Lock Cases in selected statuses
You can configure a status to lock a Case when it enters that status. Locking helps protect completed, escalated, or sensitive work from accidental changes.
Enable locking for a status
- In the Dashboard, go to Cases > Templates and open the Case template you want to configure.
- In the template editor’s left navigation, select Statuses. On the Statuses tab, select the status you want to lock.
- On the status’s General tab, under Properties, select Lock case.
- Save the Case template.
Locking follows the status’s current setting. Selecting Lock case also locks Cases already in that status, and clearing it unlocks them.
While a Case is in a locked status, normal editing by users and supported API update paths cannot:
- Change Case fields, assignments, or queues
- Update checklist items, attachments, comments, or tags
- Attach or detach related objects
- Send outbound Case email or run Case Workflow Actions
An allowed status transition is still possible. For example, configure Approved → In Review as a correction path, and leave In Review unlocked. When a reviewer moves a locked Case to In Review, the Case unlocks and can be edited again. Moving instead to another locked status changes the status but keeps the Case locked; optional comments or tags supplied with that transition are not added.
Important limitations
- Locking does not replace Case permissions or transition requirements. A reviewer needs permission to change the status, a configured transition from the current status, and any applicable transition and destination-status rules to pass. If no allowed transition leads to an unlocked status, reviewers cannot unlock the Case by changing its status. An administrator can clear Lock case on that status, which unlocks every Case currently in it.
- Incoming email replies and their attachments can still be recorded on a locked Case so customer correspondence is not lost; locking blocks outbound Case email.
- Existing checklist behavior remains in place. Use the Checklist module to define the checklist items required for a status change.
Plans Explained
Case status rules and Case locking by plan
| Startup Program | Essential Plan | Growth Plan | Enterprise Plan | |
|---|---|---|---|---|
| Case status rules and Case locking | Available | Available | Available | Available |